DaVinci Resolve just came out with an updated version of their free video editing software. I thought I would take it for a test drive in anticipation of creating YouTube content. Most professional video editing software costs upwards of 300 dollars Canadian so it would be a giant boon if this program meets my needs as an amateur video editor. I’ve heard that the interface isn’t exactly beginner friendly but I’m willing to put up with a bit of technical fumbling around if my grubby little student budget hands don’t have to relinquish any of my financial lifeblood.
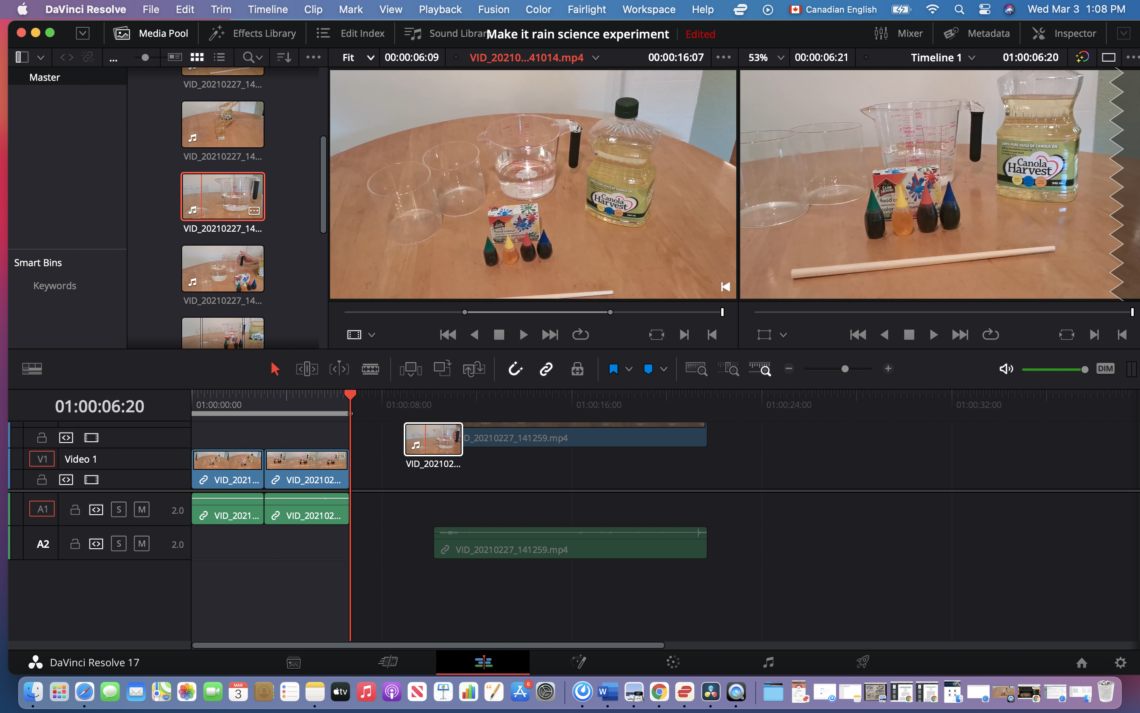
I already have to make an instructional video of a science experiment, so why not turn that experiment footage into my DaVinci Resolve guinea pig project and present it here in all of its half-hazard glory? After downloading the program and opening it up on my computer I am greeted with a screen that looks like this:

*Insert nervous laughter.* Wow. Umm, okay then. I guess I’ll be making a pit stop at a YouTube tutorial.
Step 1: Importing Media
This step is fairly uncomplicated. After downloading my video footage onto my computer, I simply drag and drop the video files into the media pool.

Step 2: Cut and Organize Clips
This step is as simple as it sounds. After figuring out how to drag the clips from the media pool into the timeline I began fiddling with the clip sizes and the clip order. Honestly, what took the longest in this process was choosing between which two almost identical clips would be best for a particular spot in the video.
Step 3: Random Editing Procedures That I Don’t Know The Name Of
Yup, I am terrible at following a structured plan. At this point I got very distracted by some editing features on the same page as the cutting and organizing page in Davinci Resolve and went to town. This took me forever. I found ways to do all sorts of things and I did them in no particular order. Any semblance of efficiency died at the hands of exploration.
I sped clips of the colour droplets way up.
I also found a way to slow clips down. Though, I ended up having to go back and redo these steps afterwards when I added in my voice over. Some of the explanations I needed to make for the video were either longer or shorter than the clips so I had to go back in and make them match.

I created closeups.
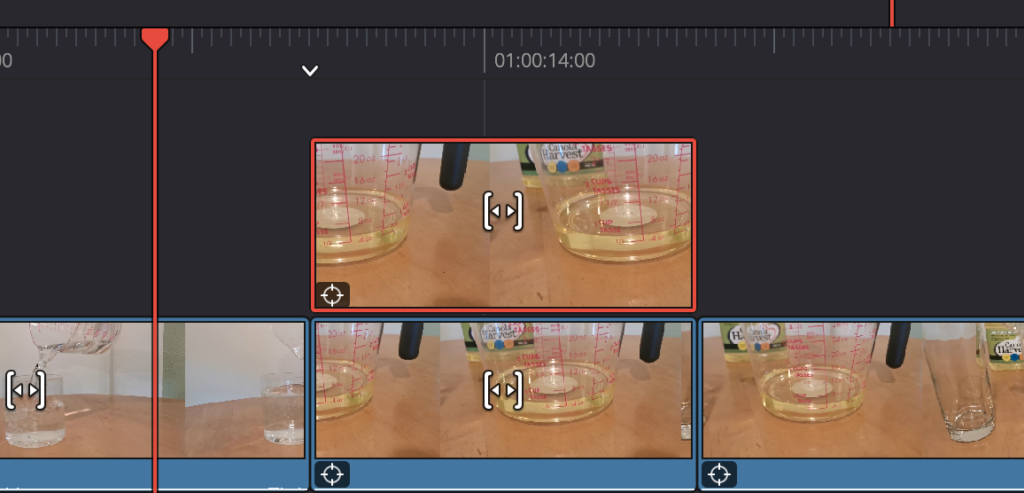
I made zooming pans.
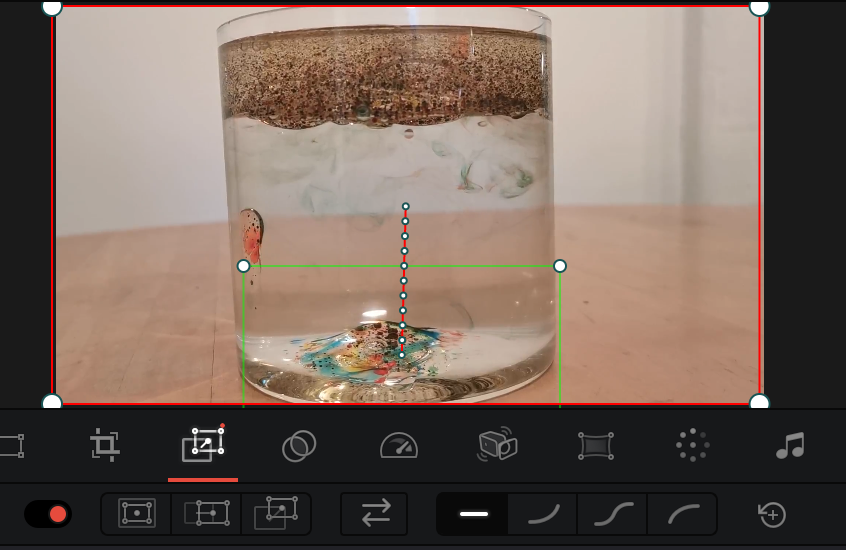
This turned out to be a bit of a pain though. It took quite a bit of fiddling to get it to look right. The green squares represents where you start and the red square represents where the pan will end. The red dotted line is the direction of the pan. So based on this image the pan would start zoomed in on the bottom of the glass and as the camera zoomed out it would also pan up. Then you had to go in and match the speed so it didn’t give you vertigo from watching.As you can see from the picture above, this particular corner of the page has a lot of editing features to add and combine. You could easily sink half an hour into editing a single clip.
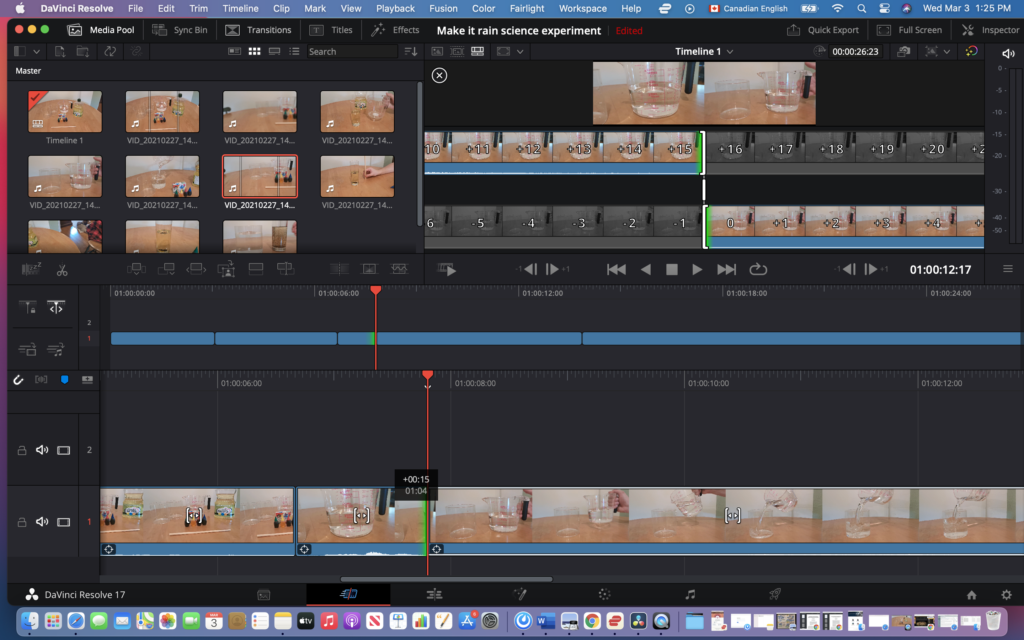
Finally, I stabilized every single clip.
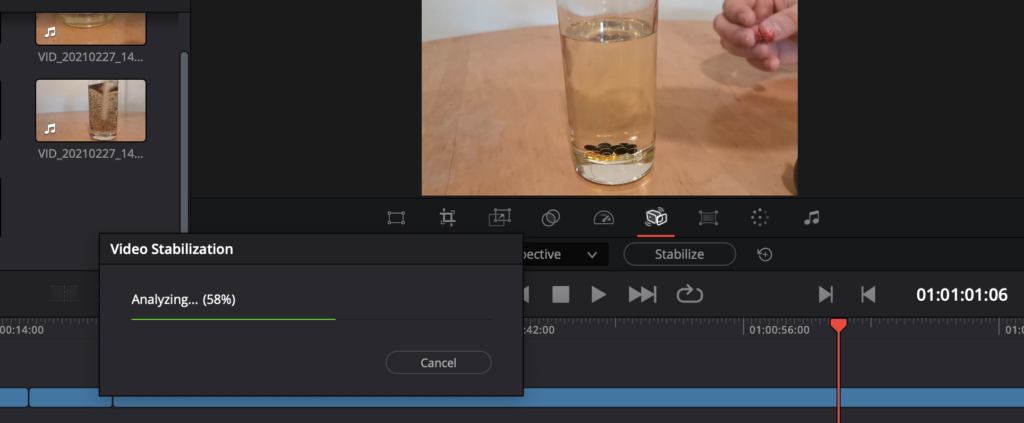
This was actually amazing. It got rid of all the shaking and jerking around that came from filming by hand on a phone.
Step 4: Color Editing
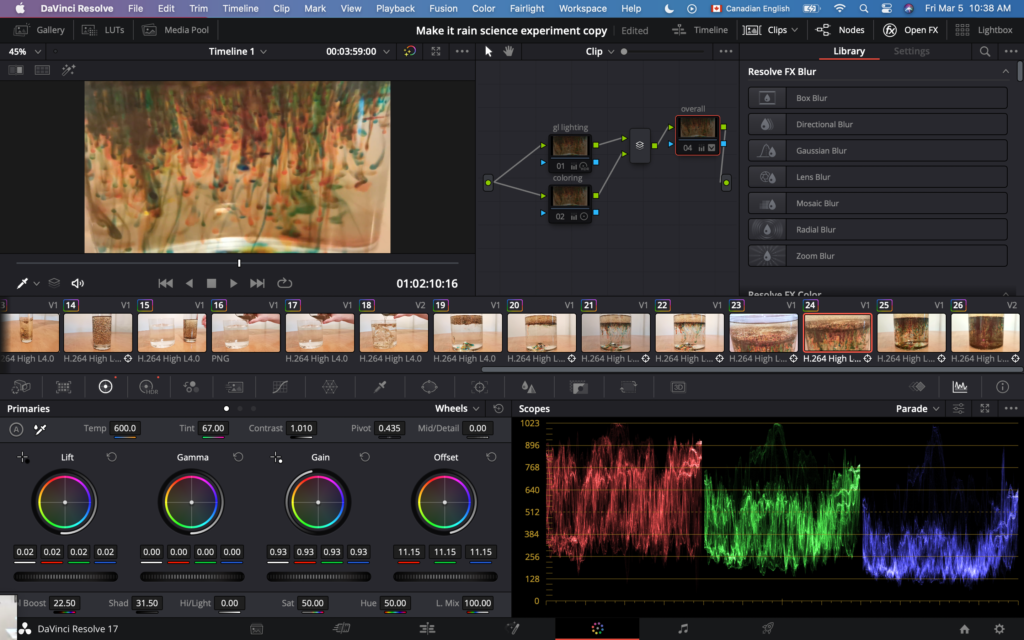
Behold the main colour editing page!
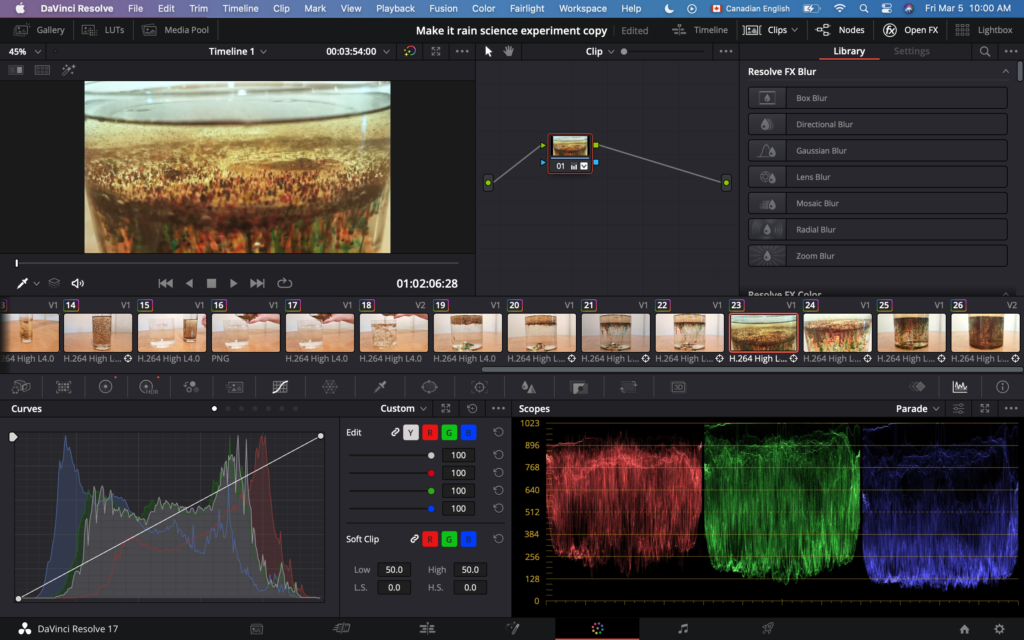
My gosh was it overwhelming! I quickly gave up on using Youtube tutorials to sort this mess out because most of them were over an hour long.
Now have a look at the bottom left quadrant where the colour graph shows what looks like spikey mountains. Yes that’s right. I said mountains. That’s how much I know about photography and colour editing. Though, I’m guessing they have something to do with the frequency levels of each colour in the image. Then direct your eyes to the heading bar immediately above it. Your eyes are not deceiving you. There are indeed twelve tabs, sub pages if you will, each featuring an ENTIRELY DIFFERENT COLOUR EDITING PANEL. For example:
Let’s take a closer look shall we?
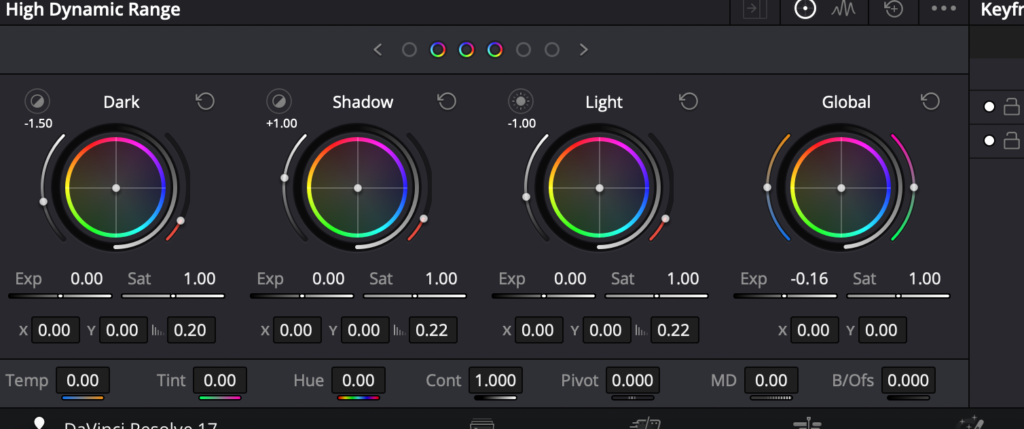
This is just one tab in one quadrant of one of several video editing pages.
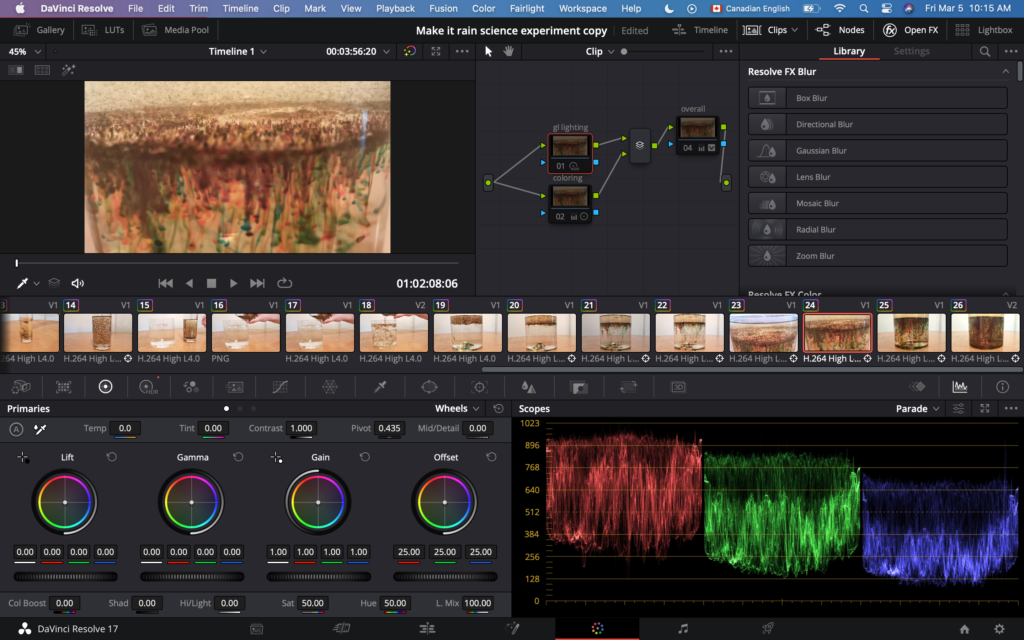
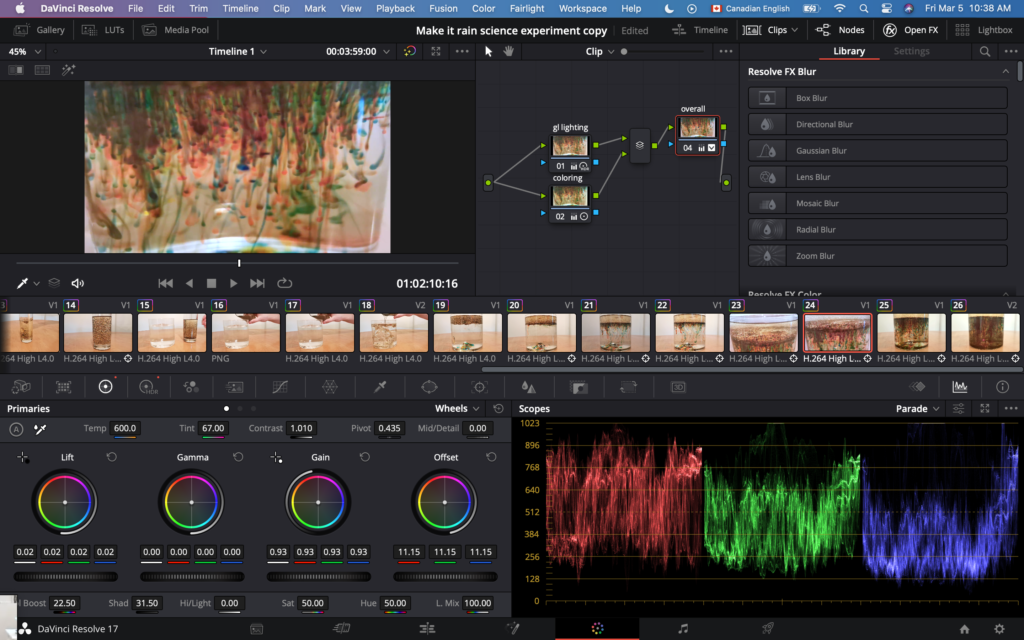
What I found super cool is that this program creates different layers of in order to keep track of all the different colour edits. Layers are called nodules. You can connect those nodules and turn various ones on or off in different combinations to see not just the before and after but also partially edited variations as well. You can see the nodules branching off like sideways tree to the right.
Before:
After:
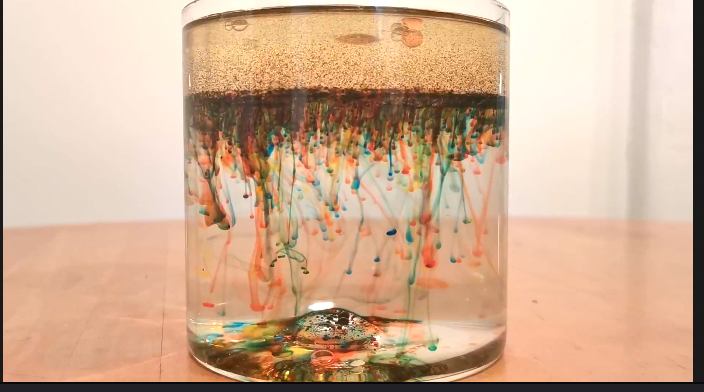
Final Product:
Although it took me over forty-eight hours of editing to get it finished I found it to be very absorbing and I ended up learning a ton. I have used other video editing apps on my phone before but this is the first time that I feel like I actually understand what I am doing.


